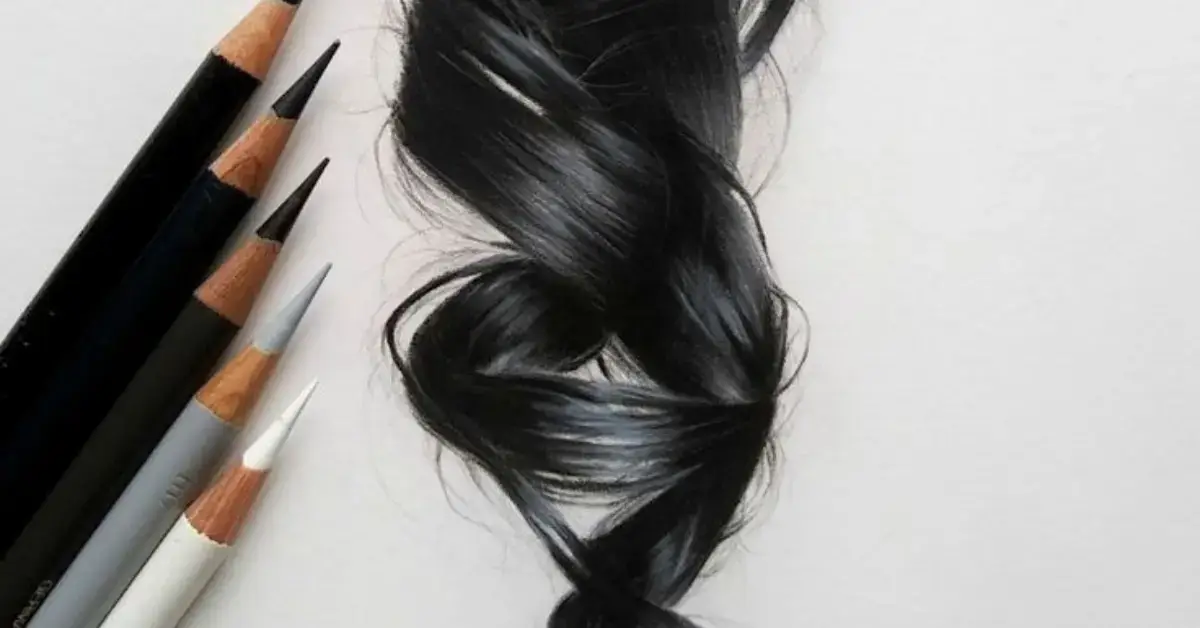
Creating illustrations of black hair can be a rewarding endeavor; it presents an opportunity to delve into diverse textures and forms, enriching your artistic creations. From the tight curls of afros to the smooth lines of straight hair, learning to accurately capture black hair can lend realism and depth to your artwork. We recognize the difficulties you may encounter with this topic, which is why we are eager to offer effective advice and methods to assist you in mastering the drawing of black hair.
Understanding Black Hair Types and Structure
When you begin to draw black hair, it’s essential to grasp the diverse range of hair types and structures. This knowledge lays the foundation for portraying African American hair accurately and with respect, embracing its natural beauty and diversity.
The Basics of Hair Types and Textures
Understanding that black hair comes in a variety of types—from waves and curls to coils and kinks—is crucial. The Andre Walker Hair Typing System classifies these textures from Type 1 to Type 4, with subcategories that further describe the tightness of the curl pattern. Type 4 hair, which often appears in Afro and coily hairstyles, is known for its tight coils and voluminous afros.

Analyzing the Hair Structure
Each strand of black hair has a unique structure, which affects the hair’s overall volume and texture. The strand’s shape, whether it’s round or flat, contributes to how light reflects off the hair, giving it a distinct sheen. It also informs us about why African American hair is more prone to dryness and breakage.
Facial Features and Hair Proportions
Your drawings must consider the hair in context with facial features—how the hairline frames the face, the volume’s relationship to the ear and shoulder, and how the hair complements the shape of the head. Each aspect must be in balance to create a harmonious image.
Importance of Reference Images
Using reference images helps you understand the intricate details and the way light interacts with different hair types. They serve as a guide for accurately representing the diversity of black hair in your drawings, from loose curls to tight 4c coils.
Hair and Scalp Health
Drawing black hair isn’t just about aesthetics; it’s also about representing its health. Signs of healthy hair include a natural sheen and minimal breakage, while dry or damaged hair may lack luster and have more visible split ends.
Fundamentals of Sketching Black Hair
Let’s take a look at the essential techniques that bring black hair to life on paper.
Creating the Initial Outline
The first step is to establish a solid outline. This is the skeleton of your sketch, where you define the general shape and volume of the hair. Start with light, sweeping strokes to create a cylindrical shape that respects the hair’s natural flow and direction. This outline acts as a guide for the more detailed work to follow.
Conveying Texture with Pencil Strokes
Conveying texture with your pencil strokes is a pivotal step. Implement shading techniques to give life to the coarse and rich texture typical of black hair. Short, curved strokes mimic the individual strands, while directional shading builds the tone and depth necessary for realistic texture.
Drawing Individual Strands and Layers
Next, focus on refining your sketch by adding individual strands and layers. This process involves drawing sharp, fine lines with your pencil to depict strands. Layering these strokes adds depth and detail, creating a realistic representation of black hair’s unique texture.
Demonstrating Hair Volume and Flow
Finally, showcasing the volume and flow of black hair is key to a dynamic sketch. Look at the hair as a series of ribbons and cylindrical shapes, giving it a three-dimensional quality. Using directional shading, build on your outline to create the illusion of weight and movement that characterizes luscious black hair.
Techniques for Realistic Hair
When we set out to draw black hair with a true-to-life appearance, our focus is on the subtle interplay of light and shadow to create depth and the intricate patterns that give hair its texture.
Mastering Shading and Tones
Shading is the soul of realistic hair drawing. Use it to imprint the illusion of depth. By varying the pressure on your pencils, you create different shades ranging from light highlights to deep shadows. Remember, the direction of your light source will influence where the brightest tones and darkest shades fall, imbuing hair with dimension.
Drawing Different Hair Styles
From the tightest coils of an afro to the sleekness of straight strands, each hairstyle requires a unique approach. Wavy patterns and braids need smooth, flowing lines, while twists rely on crisscrossing strokes. Ensure your pencil strokes follow the hair’s direction—this is key for hairstyles like curly or wavy hair, which flow naturally.
Adding Details for Texture and Volume
Texture gives natural hair its character. To capture this, etch in fine lines for straight hair and squiggly ones for curly patterns. It’s this attention to detail that elevates your drawing. Emphasizing certain strands adds volume and a tactile feel, making the hair look like you could run your fingers through it.
Techniques for Drawing Curly and Coily Patterns
When you tackle curly and coily hair, focus on the ringlets and the way the hair naturally clusters. Capturing these patterns requires observation and practice. Draw each curl as a collective of shapes that define its structure, and don’t shy away from overlapping lines to show the texture and volume of afro-textured hair.
Finishing Touches and Refinements
In the final stage of your drawing, it’s essential to accentuate the lifelike aspects of black hair with precise touches. By carefully introducing contrast and intricate details, you’ll elevate your artwork to new levels of realism.
Enhancing Hair with Highlights and Shadows
Highlights and shadows are the elements that give hair its volume and texture. To enhance your drawing, add thin streaks of white or a lighter color for highlights, especially where the light naturally hits the hair. For shadows, use a darker shade to deepen the recesses. This contrast is subtle but pivotal for creating depth.
Adjusting Hair with Erasers and Light Touches
Erasers aren’t just for mistakes; they’re amazing for adjusting tones and introducing variance in the hair’s texture. A light touch can soften an area that’s too dark, or add faint strands to create a more natural look.
Detailing Hair Accessories and Partings
Adding accessories can bring personality to your illustration. Be mindful of how these elements interact with the parting and follicles. Sketch the outline first, then fill in with the appropriate color and detail, considering the material’s texture and the way it shifts the hair around it.
Evaluating Proportions and Revising as Necessary
Inspect the proportions carefully; even a hair out of place can affect the overall look. Compare parts of the hair with each other and the rest of the drawing. Adjust as needed to ensure that our portrayal feels balanced and harmonious.
FAQ – How to Draw Black Hair
How to draw black hair realistically?
Study texture, shadows, and highlights. Use shades of black and brown, employing techniques like stippling or cross-hatching. Observe light’s interaction for realistic highlights. Practice diligently with references for lifelike results.
What are the steps to sketch male Black hair with a pencil?
Start by outlining the head shape and hairline. Focus on the general direction and volume of the hair before adding tighter curls and textures. Shading is your ally here, helping to give the hair depth and life.
What techniques should I use to draw realistic braids on Black hair?
For realistic braids, observe the overlapping sections and the pattern they form. Sketch the braids as a series of interconnected shapes and use shading to create the 3D effect. You might find that alternating between light and dark areas helps to simulate the braided texture.
Related Articles:
- How to fix stunted hair growth
- Hairstyles for black women
- Black Hairstyles for medium-length hair
- How to keep your hair straight overnight
If you liked this article about “How to Draw Black Hair” please tell us your opinion in the comments!


